One of the most common questions I get from musicians is “What’s the best way to soundproof my practice space.” For starters, the first thing you will need to determine is whether you need sound isolation or acoustic treatment–or both. Here’s how to figure this out:
Sound isolation is used when you want to prevent sound from escaping from one space into another. So if you want to prevent the neighbors from knocking on your door every time you fire up the Marshall stack, you want sound isolation. Acoustic treatment is used when you want to improve the sound within the room itself, either to tame the “bounciness” or to use the room for recording.
Science of sound isolation
The best way to prevent sound from transferring from one space to another is by creating a sealed, solid barrier between the spaces. Recording studios achieve excellent sound separation by employing what’s called a “room-in-a-room” design. By constructing an inner recording room inside the original outside room–one that doesn’t touch any of the walls of the original room–the energy of the sound leaking from the inside recording room into the outside room is greatly reduced. While this type of design is not realistic for most real world practice spaces, knowing this technique can help you make better decisions and maximize the materials and budget you have to work with. It can also help you with smaller isolation challenges like separating a guitar amp from the drum kit during recording.
Materials to use for sound isolation
Contrary to what many think, soft materials like insulation, foam, egg cartons, etc. do not help very much with sound isolation (however some will help with acoustical treatment–see below). The best materials for this are dense and solid. Drywall, aka sheetrock, is the most common material and can be found at any home improvement store–the thicker the better. Acoustic caulk works best for sealing gaps and contact points. If this is not available or in the budget, standard caulk or spackling will suffice:
- standard drywall/sheetrock—the thicker the better
- acoustical caulk (if available), standard caulk and/or spackling
Improving the sound isolation of your practice space
Sound escapes most easily where air passes, so first find out where these spots are and try to eliminate them. Plugging gaps and holes with insulation or foam will NOT help–they need to be filled with dense material like drywall or spackling and sealed to prevent air leakage. The most common culprits are doors and windows. The best way to handle windows is to cover them over completely with drywall and seal the contact points with caulk. If you’re not able or willing to cover over the windows, then try to locate and seal any areas or gaps around the windows where sound can escape. For doors, the most common problem areas are the gap at the bottom and the actual construction of the door itself. Many household interior doors are composed of two extremely thin layers of wood separated by flimsy cardboard material–in other words they’re terrible for sound isolation. If you can afford replacing this type with a solid core door, this is the best solution. Otherwise, try to beef up the door with solid dense material and try to remove as much of the gap between the bottom of the door and floor as possible.
After you’ve sealed up the leaks and strengthened the existing structure and if you have the time, budget and flexibility with your space, adding layers of drywall/sheetrock to the existing walls will be the most effective affordable solution for sound isolation. This is essentially adding a wall onto a wall. Find the thickest drywall you can afford and use construction glue and/or long drywall screws (drill through existing layer and directly onto the studs) to attach new layers of drywall. For maximum effectiveness, stagger the drywall so that no edges of the new layer line up with the original layer. Cover every inch of the original wall and seal all gaps and screw entry points with acoustical caulk (if available), standard caulk or spackling.
Isolation summary:
- seal gaps, holes and spaces in original structure with dense material–not insulation or foam–paying special attention to gaps in doors and windows
- add additional layer to existing walls using drywall/sheetrock–the thicker the better
Science of acoustics
Entire books have been written on treating rooms acoustically so we’ll stick to the basics. The ideal acoustical spaces have no parallel surfaces facing each other, including floor to ceiling—this is why many recording studios look so unusual on the inside—and have a balanced combination of reflective (hard) and absorptive (soft) surfaces. Since most people just want their basements to not sound like an echo chamber and don’t have the time or budget to build and reshape wall angles, we’ll focus on absorption.
Acoustically, most household rooms and basements suffer from hard surfaces (i.e. walls) that face each other, causing projected sound to bounce back and forth creating the echo chamber effect. Simply placing absorbent material in the room will reduce this effect and make the space more palatable. If you’ve ever moved, you may have noticed that taking furniture out of the old place makes it much more “echoey” and adding furniture to the new place makes it more “dead” sounding. This is because furniture cushions absorb sound! You can take this concept further and actually control acoustic response by adding (or removing) absorbent materials and then placing them strategically in different areas of a room.
Materials to use for acoustic absorption
Effective materials for absorption can range from relatively inexpensive household and construction items to very expensive specialty items. That stated, you really don’t need the expensive stuff to acceptably control acoustics in most rooms. Here are a few options for sound absorbers:
- plush furniture (better than nothing)
- packing blankets (better still)
- mineral/rock wool or rigid fiberglass insulation (best)
Materials NOT to use for acoustics:
Anything with the word “egg” in it. Seriously, egg cartons are almost completely useless acoustically and egg-shaped foam is fairly expensive for its practical usefulness. Just pick up some cheap packing blankets from U-Haul or here.
Improving the acoustics of your practice space
The cheapest and easiest way to achieve this is by simply hanging packing blankets along the entire wall’s surface. Ideally, these will be spaced out slightly from the wall (3”-6”) so that they don’t actually touch it. You can experiment with placement on one or two walls first and then add more if the room is still too live.
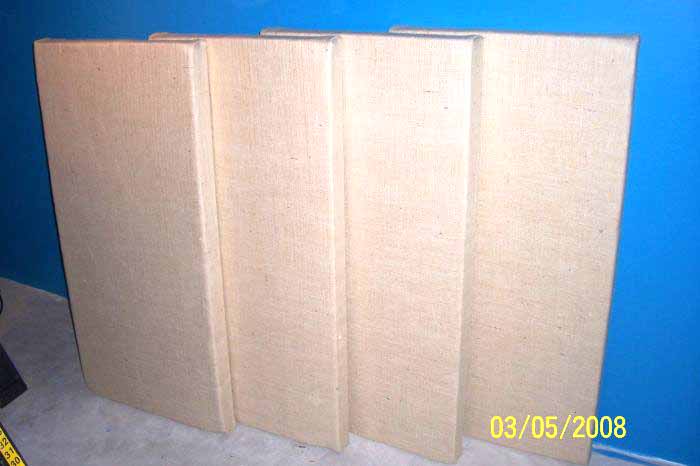
If you have a bit more of a budget (still way cheaper than the specialty stuff), you can construct simple and attractive absorber panels using furring strips, burlap and acoustic-friendly insulation. This is essentially what the pros use and is the most effective method of absorption available across the sound frequency spectrum, regardless of budget.
Here are step-by-step instructions to make your own acoustic absorber panels.
Acoustic treatment summary
- eliminate parallel wall surfaces (not realistic for most situations)
- create absorption panels using acoustic-friendly insulation and place strategically in room
PLEASE NOTE:
If you plan to use your practice space for recording, some of these tips will help to reduce unwanted room echo and may improve recordings overall. However, proper acoustical treatment for a recording environment involves additional concepts like bass trapping, diffusion, room dimension and room reverb time that are beyond the scope of this tutorial.